Hello, crafty friends! It's time again for the linky party hosted by the Build Your Stash Holiday Cardmakers.

This linky party is a great opportunity to get a head start on your holiday card stash, if you haven't already. And just because this linky party is hosted by {BYSHC}, that doesn't mean you have to use one of Crystal's fabulous sketches to participate. We just want to help you get your holiday card stash built up! But it is easier for me to have a great sketch to start from, so I'm using one. 😊


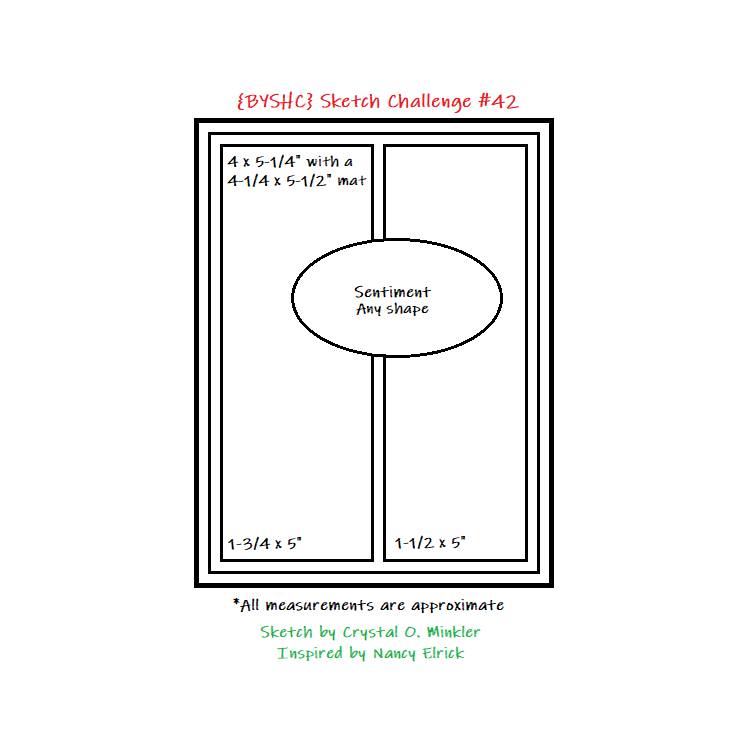
And here's my card:

I used products from Linky Sponsors Lawn Fawn and Gina Marie Designs for this card. I started out by choosing a patterned paper from one of my Lawn Fawn 6x6 paper pads, and I decided on this sweet pink Lost Mitten paper from the Knit Picky Winter petite paper pack. I die cut it with the largest Gina Marie Designs Wonky Stitched Rectangle die and layered it onto a piece of pink cardstock from Michael's. I was very pleased to find it to be a near perfect match for the patterned paper. 😊 To go along with the sweater theme, I stamped out several images from the Ugly and Bright stamp set. Ultimately, I decided to use the adorable bear and I had him don this cute snowflake sweater. For a change of pace, I colored the images with colored pencils. I used my Scan N Cut to cut the images but didn't care for the white outline around the sweater, so I fussy cut it out. 😬 Thank goodness it's an easy image! To add to the "ugly sweater" vibe, I added clear glitter gel pen to the snowflakes on the sweater. For the element in the middle of the sketch, I used the smallest of the Gina Marie Wonky Stitched Rectangles and stamped one of the sentiments from the same set in Versa Fine Clair Nocturne. This card came together so quickly, and it turned out so cute! I love this simple sketch! 💗
Be sure to head on over to the BYSHC linky party here to join in on the fun...we have so many fabulous sponsors, and there are lots of prizes to be won, so you don't want to miss out!
Thanks for stopping by and take care!
~ Marie 💗💗